Showing posts with label Women. Show all posts

Monday, 18 January 2016

Ways to Prevent Hair Loss!

Normal Hair Loss- nothing to worry about!

We all lose some hair strands each day. So, it’s normal to see some hair coming off your scalp when you brush your hair daily. Normally we lose about 80-100 strands daily due to the end of life cycle of a hair strand. If that’s the matter, you don’t have to worry a lot. Just continue to have a stress-less healthy lifestyle including balanced diet. It’s when you see an abnormal loss of hair that you should start taking measures to stop this. There are many causes of hair loss. You may lose hair due to some hormonal changes, unhealthy lifestyle, junk food devoid of nutritional value, stress, some medication, vitamins deficiency, thyroid problems, menopause etc. Whatever the causes, you should try to eliminate them first and then resort to these home remedies for hair loss.

Actual Hair Loss- Get, Set, Go….

Massage, massage and massage…

More and more people are adopting regular head massage to cure as well as prevent hair loss. Why is massaging your scalp so important? It increases blood flow to your scalp! When blood flow to the hair follicles increases, it conditions the scalp, and strengthens the hair roots. The warmed up skin during massage opens up the blood vessels that help in greater nutrient intake. Don’t forget that hair is one of the important part of your body that also needs sufficient nutrients to grow and remain strong. Proper conditioning through oil massage also prevent dandruff which is yet another cause of hair loss. Not only this, massaging is relaxing and it relieves you off stress, another cause of hair-loss. When hair massage is so beneficial, why not make it a regular habit of massaging hair twice or thrice a week? It will definitely prevent hair loss and make them healthy and shiny. But what oils to use for head massage? I’ll tell you.

Best oils to prevent hair loss

These can be categorized into two, in fact, three groups- Herbal Oils, Essential Oils and Carrier Oils (also called base oils). Carrier oils are used to dilute essential oils before they can be applied to the skin for massage. That way, while you need to use carrier oils with essential oils, you can use natural herbal oils directly on your scalp for massage. Here’s the list of herbal oils that you can use for head massage in order to prevent hair loss.

#1 Coconut Oil Massage

                                            
Coconut Oil is perhaps the best oil for preventing hair loss. This oil is used extensively in India and no one can doubt the quality of hair that Indian women possess. Coconut oil acts as sealant by preventing hair from losing its moisture. Apart from the fine nutrition that it provides to your hair, the lauric acid in coconut oil has antibacterial properties that keep away your scalp from infections.

#2 Olive Oil Massage

                                         Image result for olive oil massage to reduce hair fall
Olive Oil is rich in antioxidants and thus provide great nourishment to your hair. It also penetrates hair shafts better and prevent them from narrowing down by controlling the hormone called DTH. The extra virgin olive oil is best one when it comes to hair loss as it is rich in vitamin E and mono unsaturated fatty acids that not only prevents hair loss but also promotes hair growth.

#3 Almond Oil Massage

                                          
Almond Oil is perhaps the most nutritious oil with its rich contents that include Vitamins E, D, iron, magnesium, calcium, and fats. In fact, almond oil can also be used carrier oil when applying essential oils to the scalp. It gets absorbed slowly and deeply into the hair which makes it a perfect base for essential oils. This way you can get benefits of both- herbal as well as essential oil!
Now, it’s the turn to know the essential oils that are best for preventing hair loss.
lavender, cedarwood, thyme and rosemary

#4 Lavender Oil Massage


Lavender Oil with its wonderful fragrance is beneficial for preventing hair loss due to its antioxidant nutrients as well as antifungul and antiseptic properties. This oil derived from lavender flowers treats dandruff as well as itching, controls hair breakage all to prevent hair loss. It deeply conditions the hair and also controls dandruff. Lavender oil is widely used to treat alopecia areata too. Alopecia areata is a condition when excessive hair is lost and that too in patches. In such extreme cases daily massage with lavender oil is required. Jojoba and grapeseed oils can be used as base or carrier oil for any essential oil including lavender.

#5 Rosemary Oil Massage

                                       
Rosemary Oil, obtained from rosemary leaves, is yet another essential oil used to prevent hair loss even for acute alopecia areta condition. This oil stimulates the hair roots and increases blood circulation in the scalp leading to hair growth too. Jojoba oil, grapeseed oil as well almond oil prove to be great carrier oils for rosemary oil. So mix it with one of any carrier oils and massage your scalp daily or weekly as per your hair loss status!

Friday, 9 May 2014

5 Ayurvedic Face Packs for Glowing Skin

When it comes to skin care, we often pay more emphasis to our face in comparison to other regions.  We all wish for a healthy facial skin because it helps boost one’s confidence.
Then I must say that Ayurveda is the most useful and successful means for achieving this purpose. You will be amazed to find abundance of beauty secrets in the form of face masks and other mediums that can treat and heal the dull and blemished skin to make it into a glowing and healthy skin.
Today, we will show you a few amazing ways to make a face pack for glowing skin at home. 

Homemade Ayurvedic face packs for glowing skin

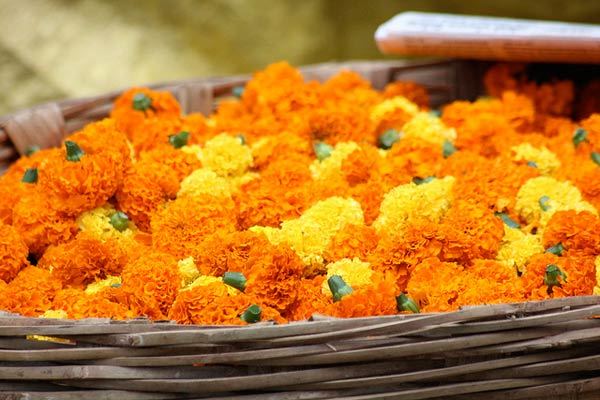
marigold flower face pack

1. Marigold Face Pack for glowing skin:

Ever tried face masks with flowers? 
It’s time you give it a shot. Genda or Marigold flowers are easily available. So just grab a few and make a fresh flowery paste with some raw milk and 1 tbsp. of honey.  Apply this on your face as a paste and leave it on for 10-15 minutes before you wash it with lukewarm water.
Besides the amazing aroma, the pack also has antibacterial and antiseptic properties that heal the aggravated pimples or zits. Doing this for at least one or two times a week helps tighten the pores and leads to amazing glowing skin. This is a pefect ayurvedic face pack for oily skin.
home face packs for glowing skin

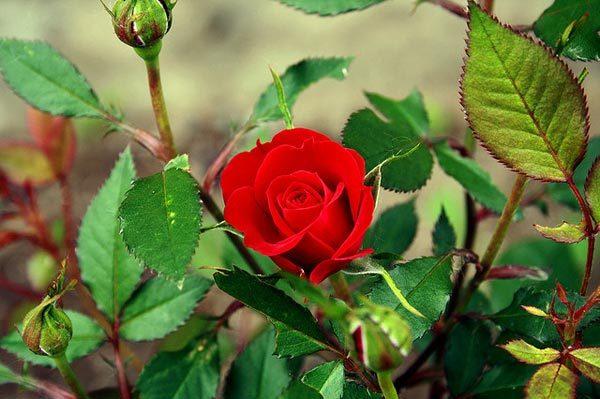
Alternative:- You can use petals of absolute red roses in the same manner.
turmeric powder face mask

2. Turmeric and Besan Pack:

This is the most common homemade ayurvedic face pack for glowing skin that is used as part of most cultures, especially during the wedding season, as it helps enhance the to-be wedded bride’s skin.
Mix 4 tbsp. of besan to half a tbsp. of turmeric powder and make a paste. You can also add some raw milk or malai for added smoothness. Use this at least once a week, for 10-15 minutes to get bright and glowing complexion.

Tip:
  • Immediately wash your face once you see the face pack cracking.
  • Dry face packs should not remain on the skin for long as it can bring forth fine lines and wrinkles.
sandalwood for face benefits

3. Chandan or Sandalwood Mask:

To make this face mask, you can use the easily available sandalwood powder instead of grabbing a sandalwood stick and rubbing it on the stone. Both the alternatives do equal justice, thus, regardless of what you use, mix sandalwood with some water or rose water and let it on the face for 15 minutes before you wash it off. This is among the most popular of face packs for glowing skin.
The benefits of this face mask are that it reduces pimples, enhances the glow and makes the skin soft. Use it 5-6 times a week for better results.

4. Aromatic Facemask:

You have to try this facepack for glowing skin.
You can achieve this mask by mixing the following ingredients.
  • One small tbsp. of sandal wood paste
  • 2 drops of rose oil
  • 1 drop of lavender oil
  • 2tbspof besan
  • A pinch of turmeric powder
  • Mix it all with some malai or buttermilk
Ensure you leave the paste for at least 10-15 minutes and when used at least once a week, it relieves stress, thus giving your skin youthful glow.

5. Ayurvedic Scrub:

Make a scrub with 1tbsp of fine rice flour and sandalwood powder. To it, add conch shell powder (optional –great for treating pimples),half a tbsp. of milk powder, and 1tbsp of besan along with rose water. Use this ayurvedic scrub once or twice a week to get a spa like scrubbing experience.

6. Honey and Lemon Mask :

This homemade ayurvedic face pack includes anti-oxidant and moisturizing properties, which helps you achieve  clean and light skin. Take 1 tablespoon of organic honey and add 3-5 drops of fresh lemon juice and then apply on the face in the right technique. Make sure to cover all areas of the face excluding the eye area. Rinse it off with clear water after 10-15 minutes. This pack will help you achieve soft, glowing skin in no time.

7. Herbal pack :

Take some besan, a pinch of turmeric and few drops of lemon along with raw milk or rose water to make a smooth pack. Apply on a thoroughly cleansed face and leave it for 10 minutes. Rinse it off with cold water to get a soft, smooth, and glowing skin. It also claims to fade away the blemishes along with removing tan and dead skin cells.
Important Tips:
1. Keep your body hydrated. Drink lots of water to clear the skin from inside out.
2. Avoid roaming in the sun too much. If it is necessary make sure to cover yourself properly with sunscreens and umbrellas.
3. Avoid oily food.
4. Regularly follow your daily skin care regimen.

Latest nail art tutorials

Amazing Ombre Nail Art

Step 1:

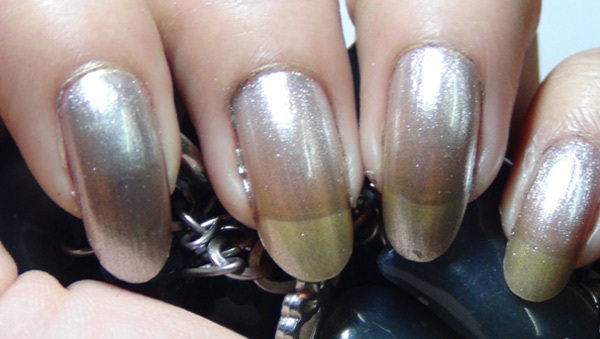
metallic ombre nails oneFor this design, once again we will start with a base coat to protect the nails from chipping. After it is dried, we will apply white nail polish. When the white nail polish has dried, we will use 2 coats of a nice silver nail polish. Now, don’t let me confuse you! Take a look at the picture below and you are good to go.

Step 2:

metallic ombre nails twoWhen the silver polish has dried, we will take the sponge and metallic blue nail polish in a palette. We will dab on the metallic blue polish using the sponge towards the tips. For this nail design the longer nails you have, the better it will be. Once you are done, it should look something like the picture below.

Step 3:

metallic ombre nails threeNow give it a standing time of 1 minute or so. Take metallic magenta nail polish on a palette. Take a new bit of sponge and dab the same till half way across the nails. Let it dry completely. Once done, it should look like the picture below.

Step 4:

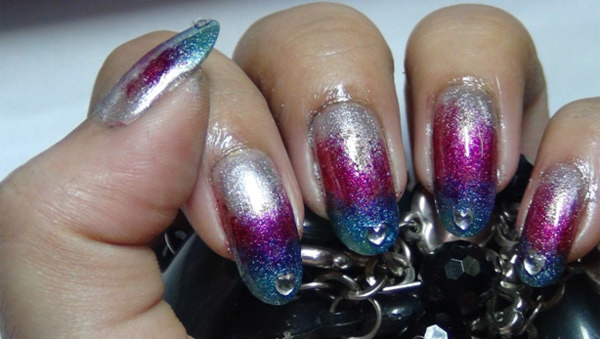
metallic ombre nails fourNow clean off the mess around the nails using a cotton bud dipped in remover. When this is done, apply a transparent polish. Immediately take your tweezers and place a rhinestone heart at the centre position of the tips. Let it dry properly. Your silver Ombre design is all ready to flaunt!
Rainbow nail art
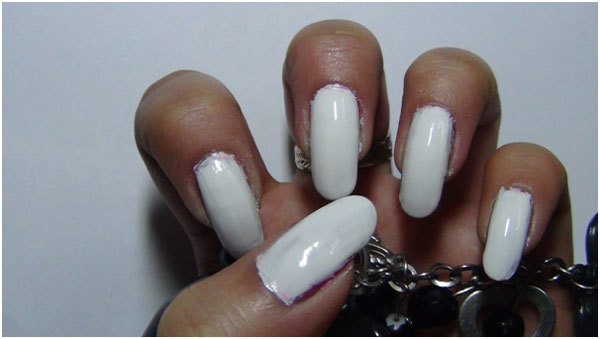
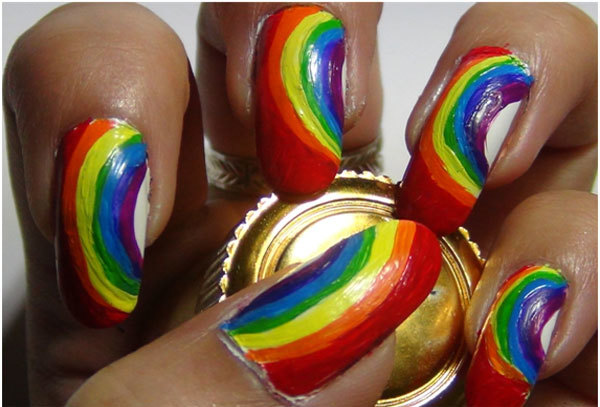
Step 1: Use base coat on your nails to prevent them from chipping and the harmful effects of acrylic paint. Let them dry. Now use two or 3 coats of white nail polish. Let this dry completely before you start using the acrylic paints.
Rainbow Nail Art Tutorials 1
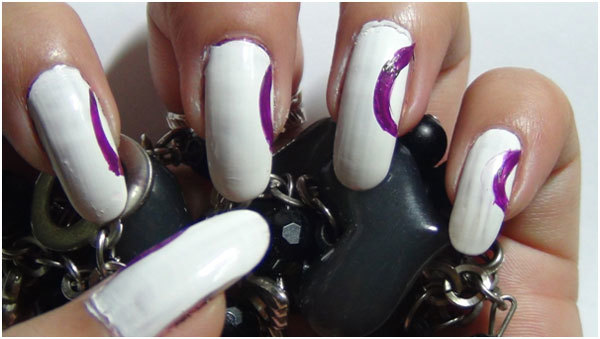
Step 2: Start by drawing a curved line with purple or violet. Follow the VIBGYOR sequence of colours in mind. If you don’t have a perfect indigo colour then mix a little bit of black, white and dark blue to get a dirty blue colour which will act as indigo.
Rainbow Nail Art Tutorials 2

Step 3: When all the 7 colours are used, it will look something like below. Wait for the design to dry completely and only then apply transparent polish. If your acrylic paint is not properly dried, then the colours may bleed and damage the whole design. This is a lovely looking design and is a must try!
Rainbow Nail Art Tutorials 3

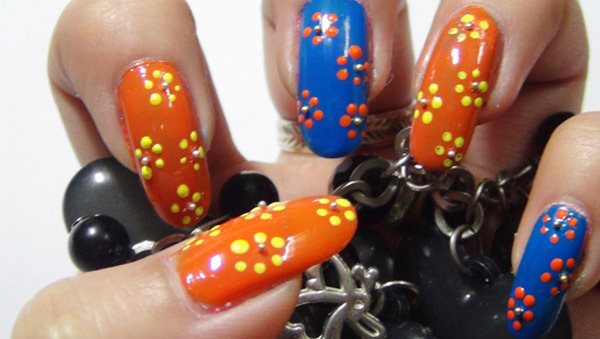
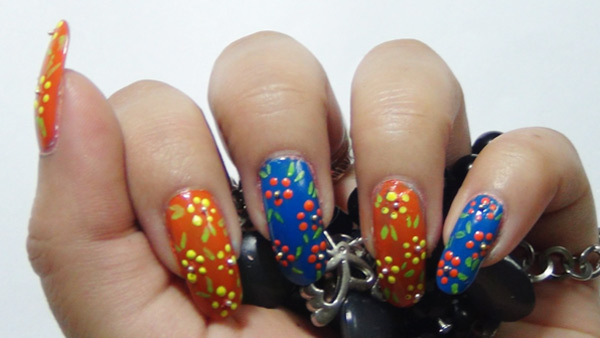
Spring Floral Nail Art:

Step 1:

  • Use a base coat to prevent nails from chipping and staining.
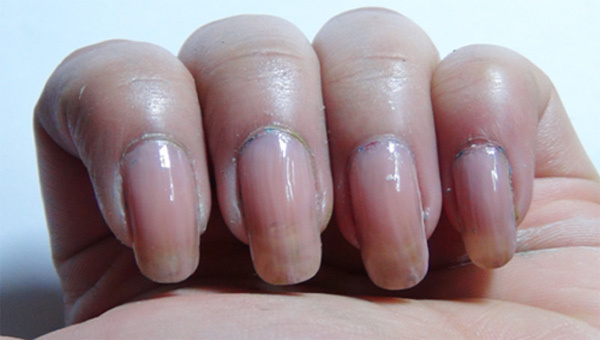
  • Follow it up with a skin colored nail polish.
one

Step 2:

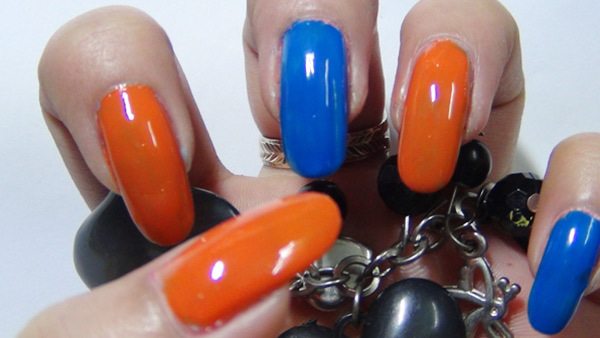
  • I have used orange nail polish for 3 finger nails and blue nail polish for the other 2. You can use colors of your own choice as well.
two

Step 3:

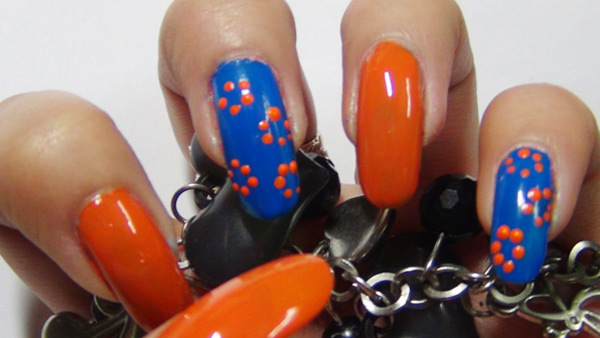
  • Take a toothpick and add 5 to 6 dots in a floral shape. Don’t join them with each other or to the centre.
  •  Use orange acrylic color for the dots over the blue polish and yellow colored dots over the orange polish.
three

Step 4:

  • Use a little transparent polish on to the centre of the flowers.
  • Put silver caviar beads at the centre of each flower.
four

Step 5:

  • Take your thin nail art brush and light green color. Draw up some leaves. Allow it to dry.
  • Apply a nice layer of transparent top coat.
  • You can sport this nail art with almost every outfit which has bright colors or floral prints in it. This is a brilliant nail art for daytime.

five

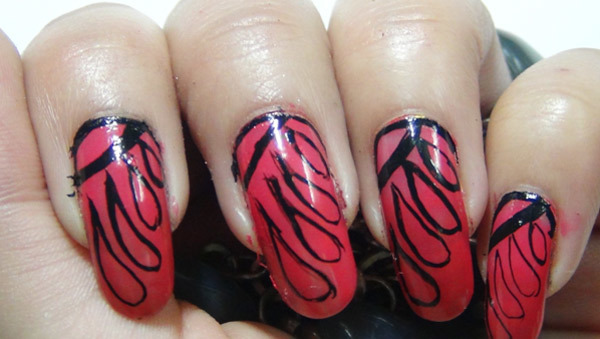
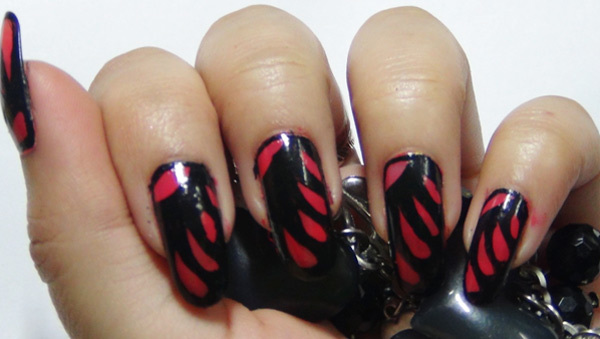
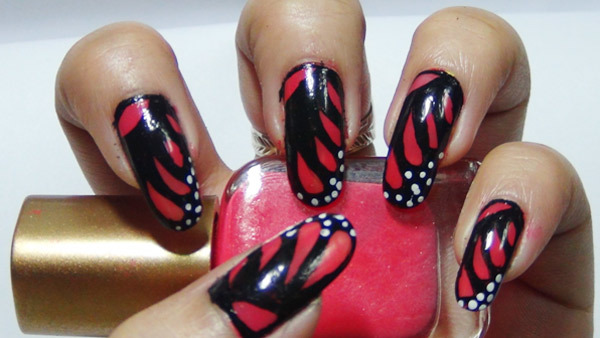
 Monarch Butterfly Nail Art:

While talking about spring time and flowers, the next thing that came to my mind was butterflies. Hence, I did a monarch butterfly nail art. This is a gorgeous nail art. This can be beautifully done with a little extra time and precision.

Things You Need:

  • A base coat (optional)
  • A skin colored nail polish
  • A pink nail polish of your choice
  • Black acrylic paint
  • White acrylic paint or white nail polish
  • A toothpick
  • A thin nail art brush
  • A transparent topcoat

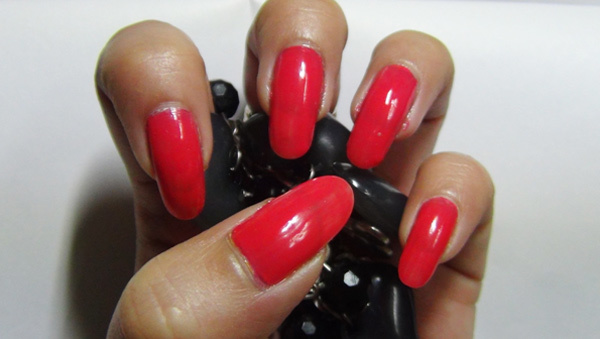
Step 1:

  • Use a base coat.
  • Follow it up with a skin colored nail polish for making the base more opaque. It will also help protect your nails further.
  • Let it dry and then use 1 or 2 layers of your favorite pink nail polish.
six

Step 2:

  • Take your black acrylic paint and your nail art brush.
  • Paint water droplet designs like shown below. You need to maintain a good shape but don’t worry about the unevenness at the sides. These will get covered up in the next step.
seven

Step 3:

  • Cover up the spaces with black acrylic color.
eight

Step 4:

  • Let the black color dry completely.
  • Now, take your toothpick and add a few dots with white acrylic color like shown in the picture below.
  • Once dry, seal this beautiful design with a transparent top coat.
Sport this nail art with your spring or summer evening outfits. This can be a gorgeous party nail art too. Hope you enjoyed both the nail art designs. Which one will you try?
nine