Here are some of the Arabic Mehndi designs for hands and feet that we found to be quite beautiful.
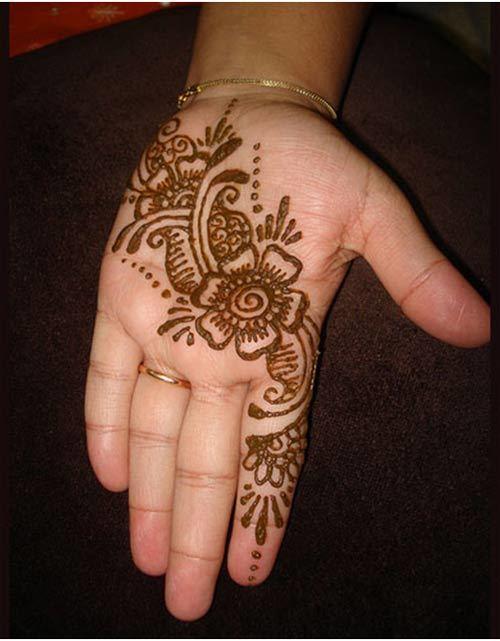 1. This design is short and sweet and looks non-fussy. For those who shy away from large full hand designs, this one will be a welcome design. It contains simple designs and patterns that can be styled by anyone.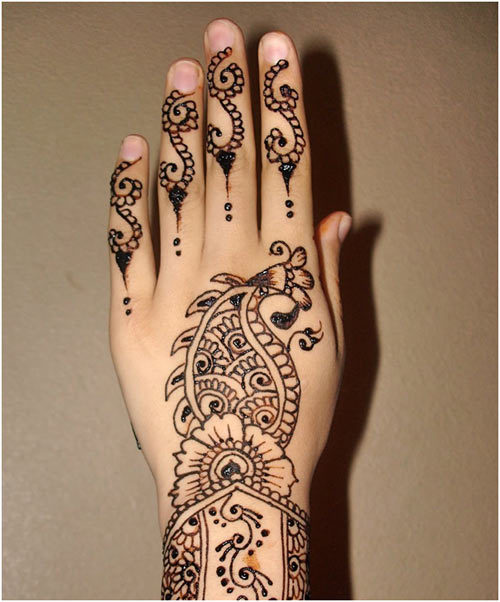
2. This one is ideal for the top of the hands. It is neither too full nor too less. The design beautifully gives the hands a filling effect without having too much detail and intricate designs. This is a simple and easy way to decorate the top of the hands beautifully for your wedding or for any occasion.
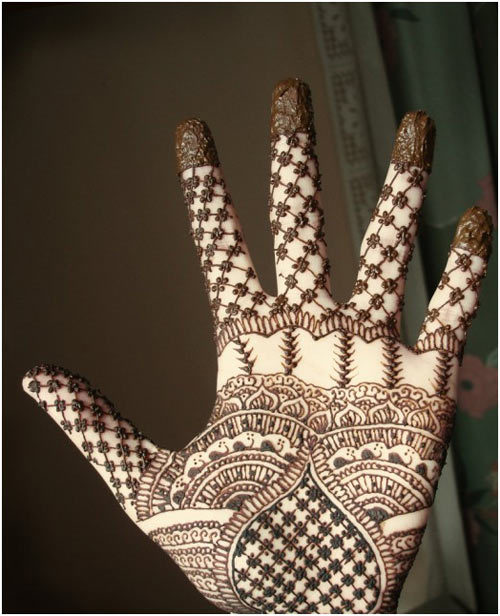 3. Want some out of the ordinary designs for your wedding? Then try this one. It is very pretty with the net effect and the inverted heart pattern on the hands. Though this arabic mehndi design is complex, this looks quite simple and will make any bride’s hand look beautiful.
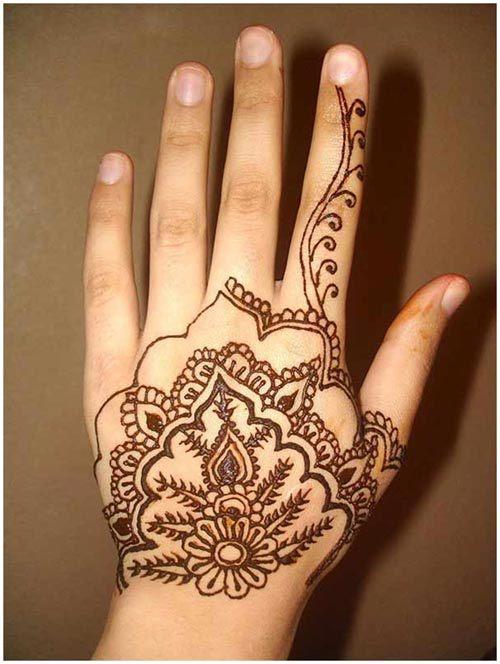 4. Another simple yet beautiful design for the back of the hands. This will look great on occasions like Eid and weddings too. This simple design makes use of floral and simple designs to keep the design pretty.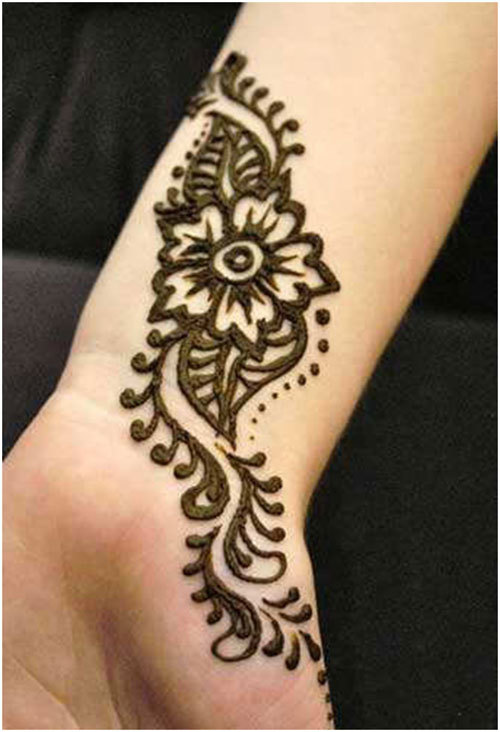
5. This is one of the simple Arabic mehndi designs on wrist that looks unique. You may use this design by itself keeping the palm free of any colour or you can also include it into any other design you like.
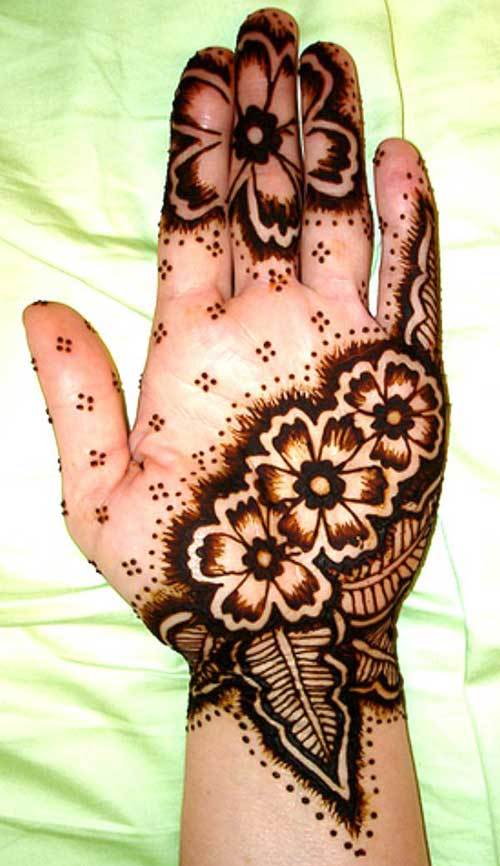 6. Looking for some out of the box Arabic mehndi designs for hands? This design looks quite unique with the large floral patterns on it. It is a nice blend of intricate as well as simple designs. While one side of the palm and fingers are decorated with intricate large designs the other side is kept simple with occasional dots making this a choice for the modern bride as well as for the bridal season. This will let your hands stand out from the crowd easily.
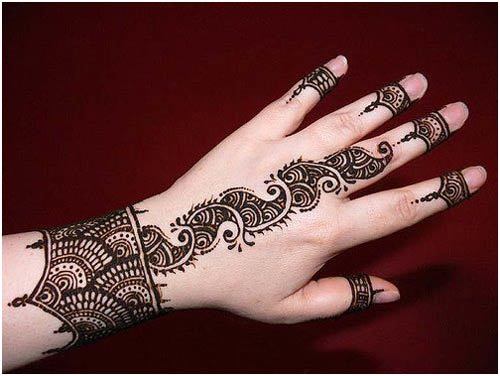 7. A great look for the parties, this one of the latest Arabic mehandi designs gives the back of the hands a great look with its wrist let designs and the small but pretty designs at the tips. On the whole, it is a great design which is simple yet fills the hand.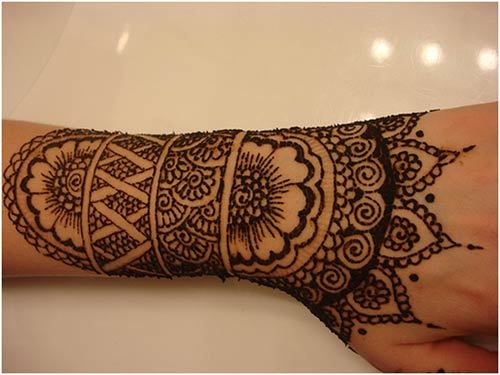
[ Read: Best Black Mehndi Designs ]
8. This is a pretty intricate design with small details. The use of black mehndi and very thin lines make this mehndi design look even better. There are distinctly different patterns used in the design with floral, geometrical and religious inspirations.
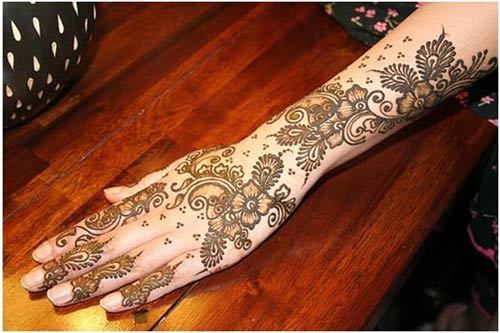 9. For those who want a filling yet simple mehndi designs, this will be a great choice. This design uses large motifs to cover good amounts of skin making the design look filling.
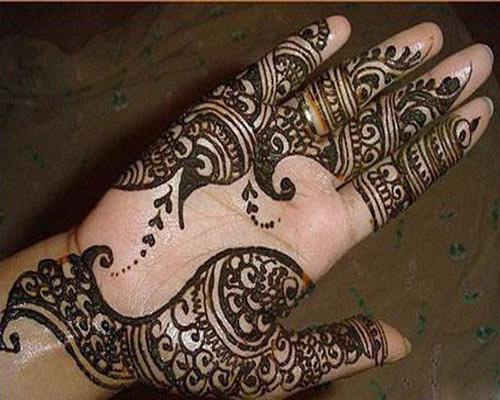 10. If you love different and unique patterns, then you may try this one. It is a lovely blend of intricate small mehndi patterns and open space making it apt for the bride for any occasion. The tips are kept open rather than being covered in mehndi. There is use of the net patterns and shading too making it quite unique. All in all this design is sure to turn heads .
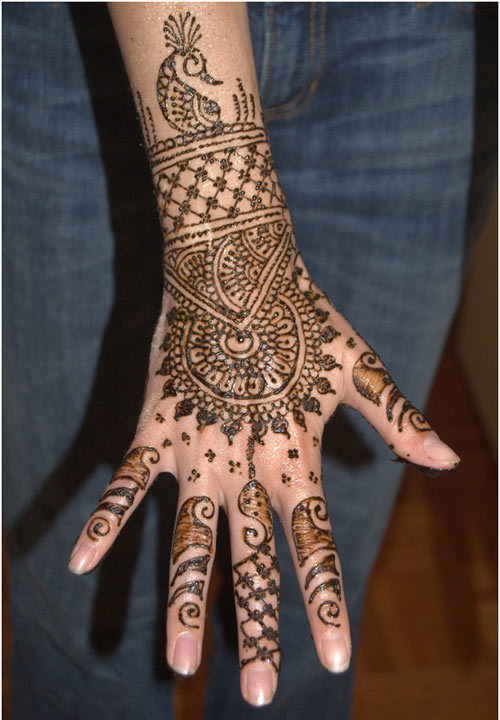 11. For those looking for a complex design for eid and other occasion,s this one will be a good choice as it has a great mix of patterns and shading. The fingers are also decorated with mehndi and the middle finger is given special importance with multiple patterns.
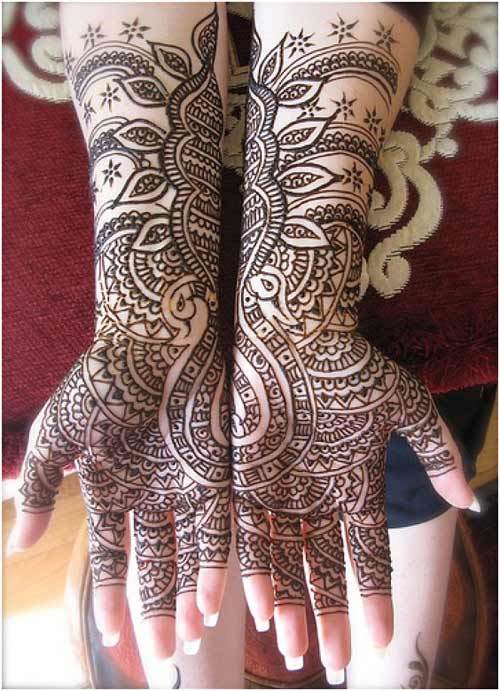 12. This one is an example of the bridal Arabic mehendi designs which is sure to take your breath away. This design is full of complex patterns and small details. The patterns are also quite unique and will surely be the talk of the crowd at your wedding. The tips are kept open for that unique touch.
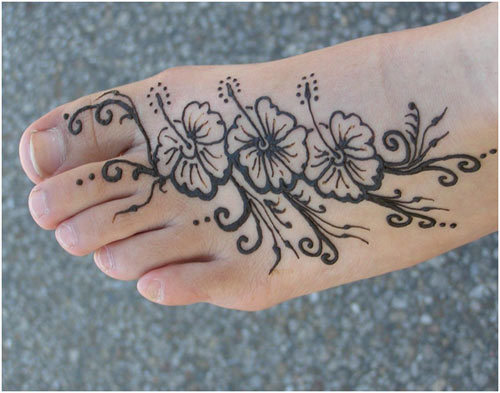 13. Here is a fairly simple design with large motifs. There are mostly floral patterns without many details. This design is apt for Eid and even for the bride who wants something simple yet pretty for the feet.
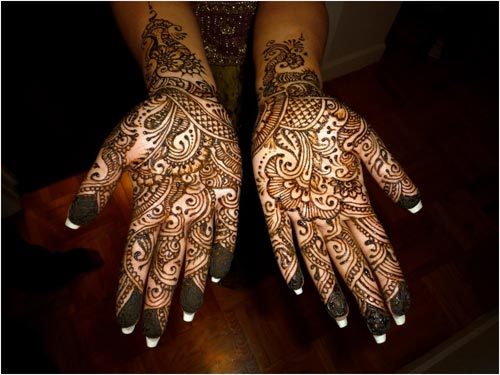 14. Love intricate full hand designs? Then we have this style to show you. It’s a great way to fill up the hands with intricate designs to make them look beautiful. The tips are closed with mehndi and this pattern fills up past the wrist also making it a good choice for the bride.
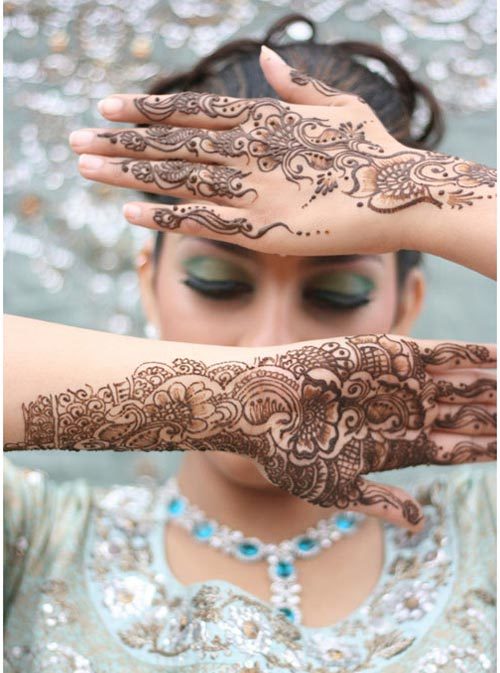 15. This beautiful and intricate design is apt for the bride who likes small designs and motifs. It fills the hands and will surely draw attention to you at the wedding. With thin lines and very fine designs used, it is a sure success.
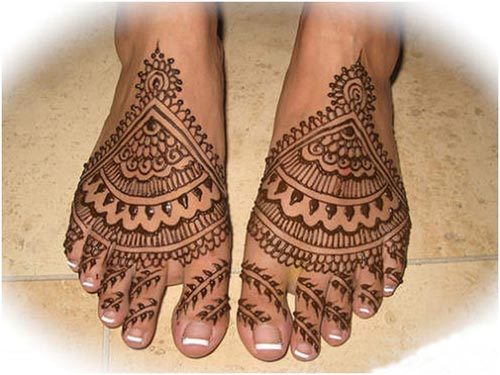 16. This design is apt for the bride’s feet. We all know that at the wedding bride is the center of attraction, so why leave your feet bare when you can use these pretty designs to fill them up and make them look pretty. This design fills the feet completely and the small leaves pattern on the toes looks super cute too.
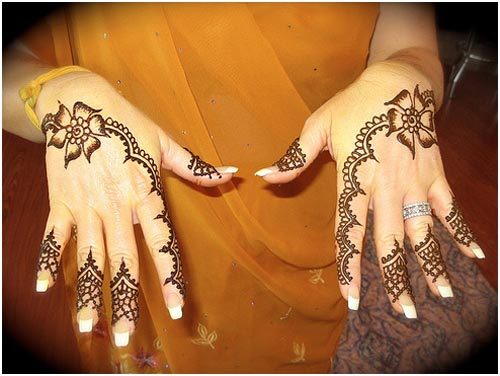 17. For those who love simple designs for their mehandi can choose this design. It has less number of designs and a large portion of the hand is kept open. There are though a number of intricate designs making it a beautiful mehandi choice for Eid. The design on the fingers and the large flower looks great and adds beauty to the hands.
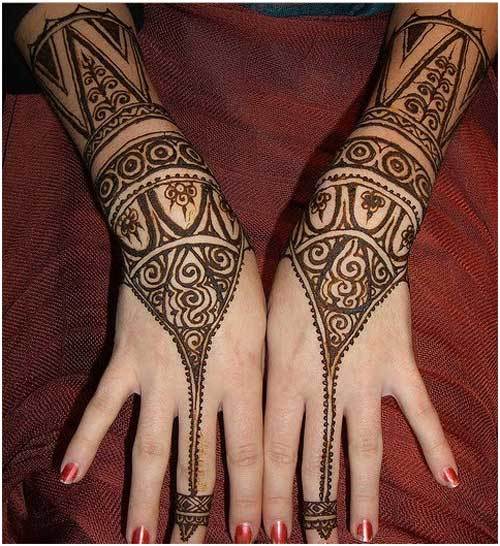 18. This is a very unique design and totally apt for the modern bride. This is a great way to clad your hands with mehandi. The unique pattern and the minimal design makes this a sure hit among the guests.
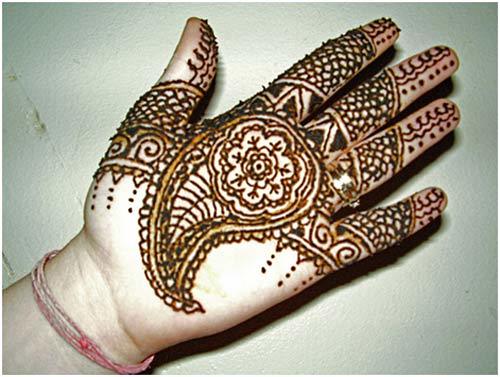 19. Now for a much simpler design for the hands. This is really apt for the brides and the festive occasions too. This design is a nice mix of uniqueness and intricate designs.
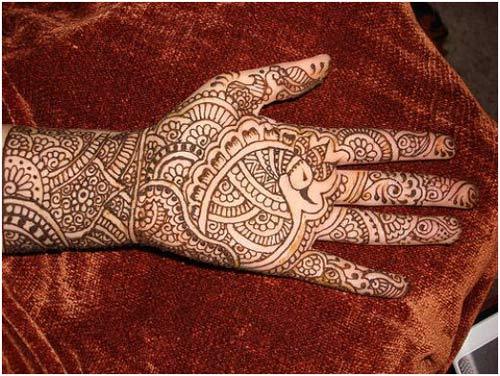 20. This design is filling yet simple and makes the hands look beautiful. There is a good use of black mehndi and shadings too. The inclusion of the peacock is quite unique in an Arabic pattern as the peacock design is usually seen in Indian mehandi designs.
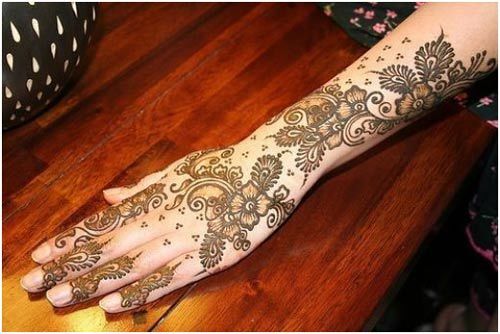 21. The next one is a great choice for the bride. It is a filling mehndi design for the hands which will help your hands look pretty. The designs are mostly floral and have small dotted patterns over the hands too. The fingers and also decorated using small yet pretty patterns.
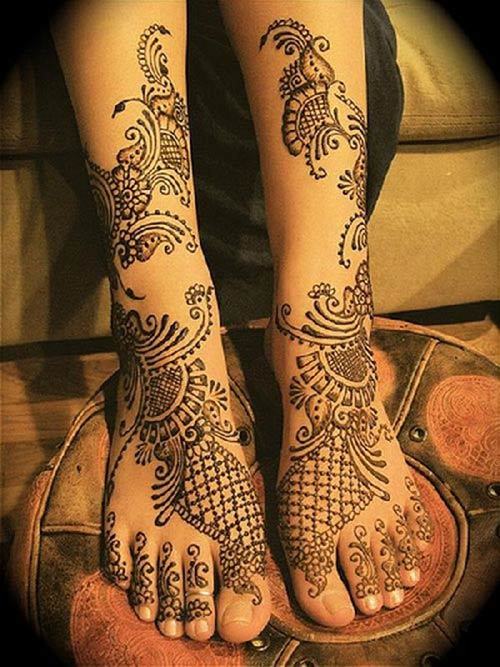 22. Do you love intricate designs on the feet? Love to get one done at your wedding? Then try this one as it is full of small delicate designs as well as filling. The design will surely attract a lot of attention to your feet at the weddings.